Dirt Cheap: Em4 plastic orcs

I have bunch of really cheap miniatures in my collection. So for all of you that come across these cheap minis while surfing the web and wonder if miniatures that cheap really are worth your time and money I am starting a series of reviews called “Dirt Cheap”.

I am starting with the cheapest of the cheap. Em-4’s fantasy plastics. The range consists of six different miniatures, three orcs and three dwarves. They are sold in bags of 50 for £7.7 (!), which works out at rougly £0.16 per miniature! They can also be bought loose for £0.21 per miniature. As you can see this is mindboggingly cheap, and when I put in an order for some other stuff I couldn’t resist adding a few to my order.

First a bit of background on these minis. They were first released in 1990 as a part of the Fantasy Warriors box set, a game produced by Grenadier Models. They seem to have been sculpted by Mark Copplestone but imitating the style of Nick Lund.

orcs_unpainted

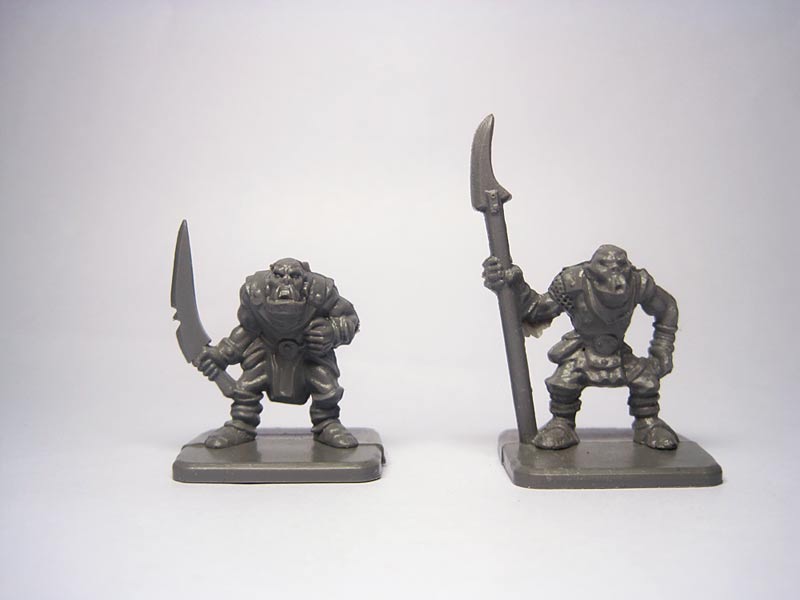
As you can see from the pictures they are produced in a grey plastic and unlike other plastic miniatures they do not come on a sprue.

The orcs have one of the classic old school monopose poses, the weapon to the side and the hand close to the hip. Not very three dimensional, but very much standard for the time they were released, so no problem there.

The details are very soft, and these miniatures are not very detailed to begin with.

orcs_unpainted_back

On the back of the miniatures, there are these weird round pegs sticking out. This is probably where the plastic was injected. These were quite easy to remove though if you are a reasonably experienced hobbyist since the plastic is quite soft and easy to cut.

orcs_mouldllines

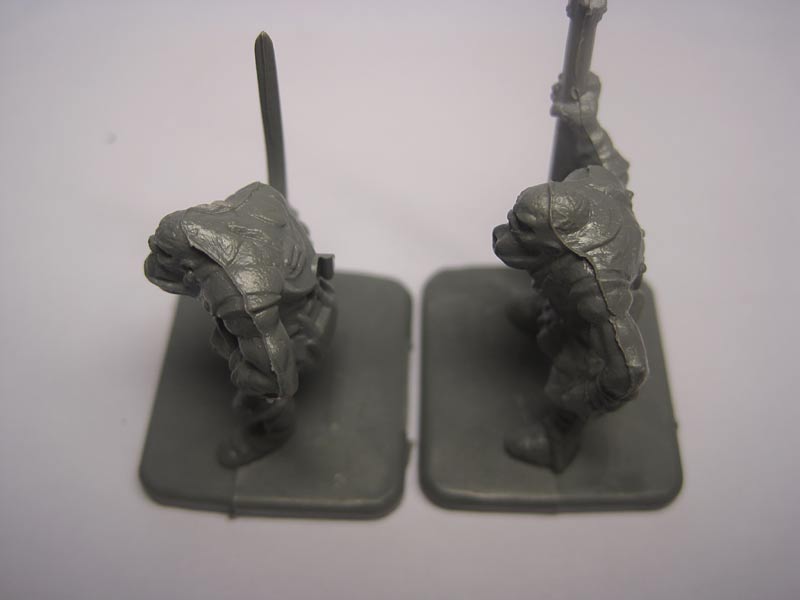
The mouldlines are very heavy, but since these guys doesn’t really have any fine details, removing them was easy.

orcs-painted

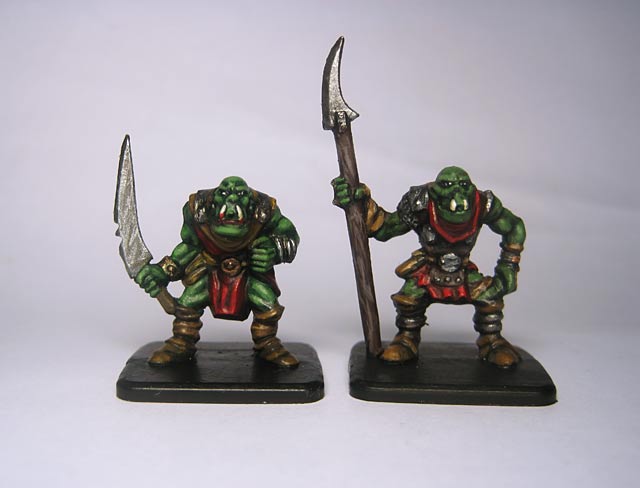
After a quick paintjob they do look quite good. The swordsman also turned out to have slightly better defined details in the face. Things like is hard to notice until you paint the miniature. I do like the look on the face of the left one.

It is hard to review miniatures that are as cheap as these because you are not expecting anything from them. Compared to other plastic miniatures from the early 90’s these orcs look fine. And that is probably the only standard you can hold them against without being unfair.  At this price, it is hard to say anything else than that they are anything but good value. But if you expect to them to be anything like a modern plastic miniature, you will be disappointed.

I don’t see myself getting more of these. They need some work to look good, and I simply don’t have the need for loads of cheap plastic old school orcs. But if you do, they are indeed very cheap, and EM4 is a very nice company with excellent service.

Links and further reading:

They can be bought from: http://em4miniatures.com/. A company that also sell a lot of very nice ex-Grenadier metal miniatures at very good prices.

In this thread at the Lead Adventure Forum, there is a very impressive project, where an entire army of orcs are made from EM4-plastics. Three monopose orcs into 147 unique ones!


Tutorial: Mould line removal from Mantic’s PVC (restic) miniatures.

Mantic’s PVC miniatures (called restic, premium plastic or sprueless plastic by mantic) has gotten a reputation for being hard to work with. I feel that this is not entirely fair and might have something to do with the material being relatively new compared with metal and injection plastic. This is how I do to remove mould lines.

Tools of the trade.

Tools of the trade.

What you need is a sharp hobby knife, and a wire brush. They are often sold in kits of three, one steel, one brass and one nylon. The nylon and the brass one is the ones used for this purpose.

scraping

My hands have a really weird colour in this photo. This is what happens when you photograph under fluorescent light.

First of all I use a sharp scalpel to scrape and cut away the mould lines. This goes against common internet wisdom that says that you only can cut it away. I mostly scrape because it is easier and I find that it gives me better control. For some places on a miniature cutting is easier, but in maybe 80% of the time I scrape. Using a file seems to work quite well also, but i prefer scraping with a knife over filing for everything except some parts of metal miniatures. But more on that later.

fuzz

This doesn’t look that good does it? It is hard to photograph but there is plastic fuzz and a some burr along the removed mould line.

brush

To help with the fuzz we bring in the wire brush! I usually start with the nylon, if that isn’t enough I use the brass one.

finishedarms

And now the fuzz is gone! The brass wire brush is hard enough to remove the fuzz and burr, but soft enough not to damage the details.

Filing then? I decided to try it out on a miniature to see how well it works.

judwanmouldlines

The miniature used in this example is Mee’kel Judwan, a MVP from Dreadball. As you can see the mould lines are very visible. In the folds of the cloak it could be quite hard to remove the mould lines with a scalpel. Here a file is suitable to use.

filing

I use cheap needle/jewelers files from a hardware store. They are a alot cheaper than the stuff you buy in the hobby shop, and are the basically the same.

fuzzyjudwan

As you can see the fuzz and burr is even worse when you use a file.

judwanafterbrush

After a quick go with the brushes the fuzz and burr is mostly gone, It seems however that you need to brush more after using the files than scraping with a scalpel.

Saving The Panther Lancers Part 2: First attempt!

This is the first result of my Panther Lancer rescue attempt.

IMG_2640_blog IMG_2641_blog IMG_2644blog

I am pretty happy with the result, but I will try to make the arms better proportioned in the next one. I will also see if I can do anything about the big hands. The shield comes from E-M4 miniatures where you can buy a bag of 50 mixed shields for £1.02!

I will probably explain more thoroughly in a later post how the conversion was done.

Saving the Panther Lancers Part 1: Review and parts breakdown

pantrar

Image from manticgames.com.

In my 2013 Mantic crazybox I got six Basilean Panter Lancers, and thus they became the most awkward miniatures in my collection. They are a odd bunch, some parts are well sculpted, others not. Some parts are well proportioned, others way off. It almost as if the parts were made separately and then added up to make the model. There are also some design choices I don’t agree with, but this is a separate issue from the problems with execution of the design. I will come back to both as I go through the parts of the miniature.

The plan is to try and “save” these miniatures, making them look good without completely remaking them.

sistersbodies

Looking just at these they seem fine. Questionable cup size though.

sisters_heads The heads are a mixed bag. the faces are ok. Top left, is that a braid or an anaconda. Hooded ones boring. The necks are way to long, the heads doesn’t fit on the bodies. sisters_armsI really don’t know what is going on with does forearms, did they use Photoshop Disasters as an anatomy reference while sculpting? The hands are also very big. I also don’t like how the the left arm is empty, it think it is supposed to look like it is holding reins, but it just looks odd.sisters_saddleSaddles, wont use these. Looks heavy and awkward for riders that are supposed to look light and nimble. The feet wont even rest properly in the weird platform stirrups.sisters_cats

The panthers are ok, but the leaping one is a bit questionable in a unit.

So to sum it up, this is what needs to be done.

  • Shorten neck, fit.
  • Shorten forearms.
  • Reposition arms so the pose is better.
  • Sculpt some kind of more reasonable saddle.
  • Add a shield or something to the left arm.

This might sound negative, but they are cheap if you get them from Mantic and it will probably be fun to fix them.